Getting Started with Aqua Ad Server
Do you have a brand new Aqua Ad Server account? Are you considering to open one?
Please follow the comprehensive tutorial on this page to find out what it takes to get your very first banner displaying on your website.
- Defining a Website
- Defining a Zone
- Creating an Advertiser
- Creating a Campaign
- Creating a Banner
- Linking the Campaign to the Zone
- Generating the Zone’s Invocation Code
Click any of these steps to jump straight to the section.
Pro Tip:
Clicking any of the images below will reveal the full image for easy viewing.
Note: Even though you can view this Getting Started page just fine on a phone or tablet, the user interface of Aqua Ad Server itself works best on a larger screen like a laptop or desktop computer. Delivery of ads on mobile devices works perfectly fine, by the way.
A new Aqua Ad Server account
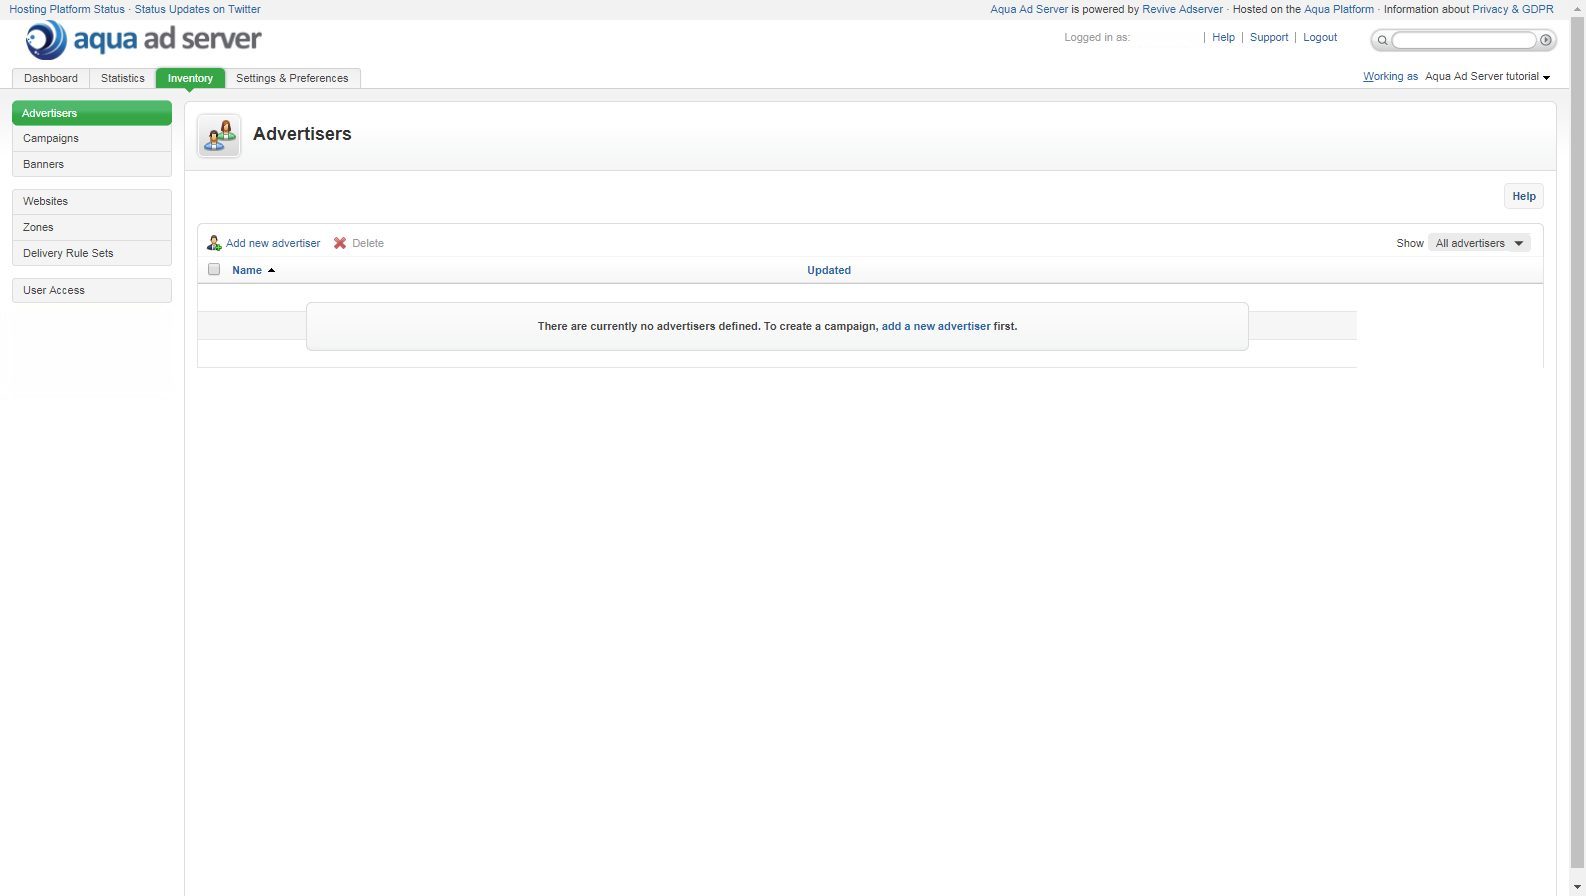
After you first log in on a brand new Aqua Ad Server account, you will be greeted by what might seem like a somewhat intimidating empty screen.
Unlike a word processor, where you can just start typing, things are a little bit different when you begin using Aqua Ad Server.
Don’t worry, you’ll be creating a few items and will have your first ad displaying in no time!
Aqua Ad Server is a hosted service based on the well know Revive Adserver open source software. In this tutorial, we’ll be linking to pages of the Revive Adserver documentation for more detail and further instructions.
Defining a Website
In Aqua Ad Server, you can define one, or two, or as many websites as you want.
When you first log in, you will be in the Inventory tab. If you’ve moved around a bit to see what else is available, return to the Inventory tab now.
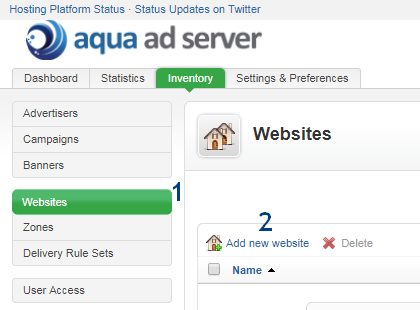
Click the Websites link in the left hand menu, and then click the Add new website link in the middle region of the screen.
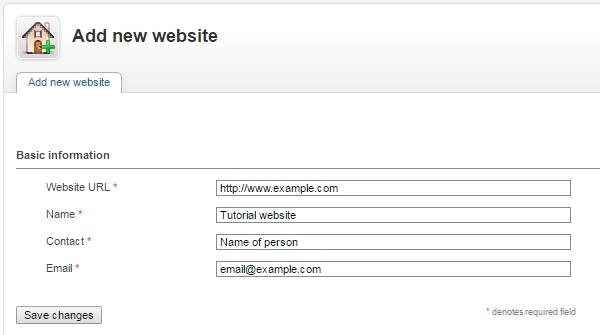
- Entering the URL, while mandatory, does not imply that the site is going to be checked. You can use the invocation code you create later on in this tutorial on any website.
- Make sure to enter a good website name, as this will be visible later in the lists of websites and in the statistics. Keep it short but descriptive.
- You must enter a contact name and e-mail address, but these are not actually going to be used for any functionality.
- After you’ve entered everything, click the Save changes button.
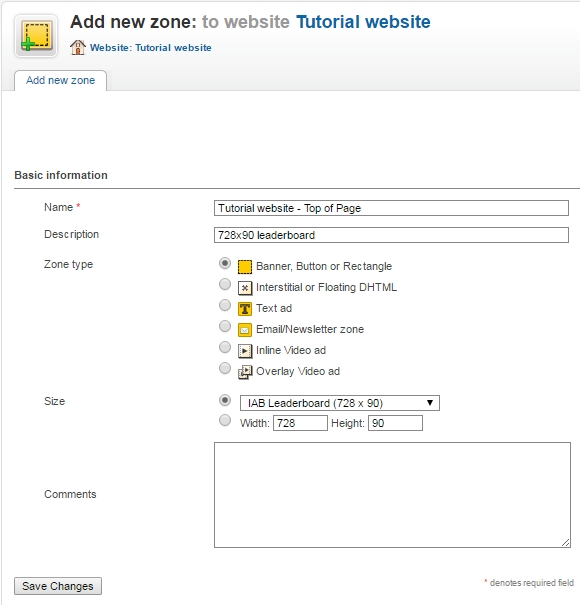
- For the Name, enter something that’s short but still descriptive. This name will appear in the list of zones, and also in the statistics. A good name will make it easier to recognize later.
- The Description is not mandatory but can be very useful when you have a longer list of zones for one website.
- In this tutorial, select Banner, button or rectangle for the Zone type.
- Select one of the pre-defined Size options, in this tutorial it is assumed you will use the IAB Leaderboard (728 x 90).
- Once you have entered all the settings, click the Save changes button.
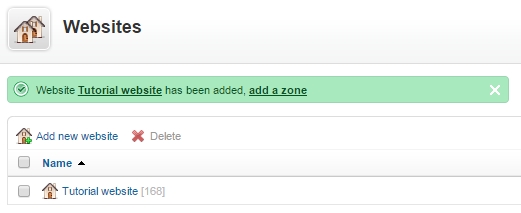
Your new zone will be saved, and it will show up in the list of zones. From here, you could continue to create more zones, but for this tutorial, we need just one zone. You will return to this page at the end of this tutorial to grab the zone’s Invocation code.
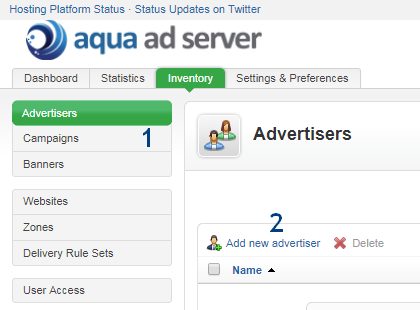
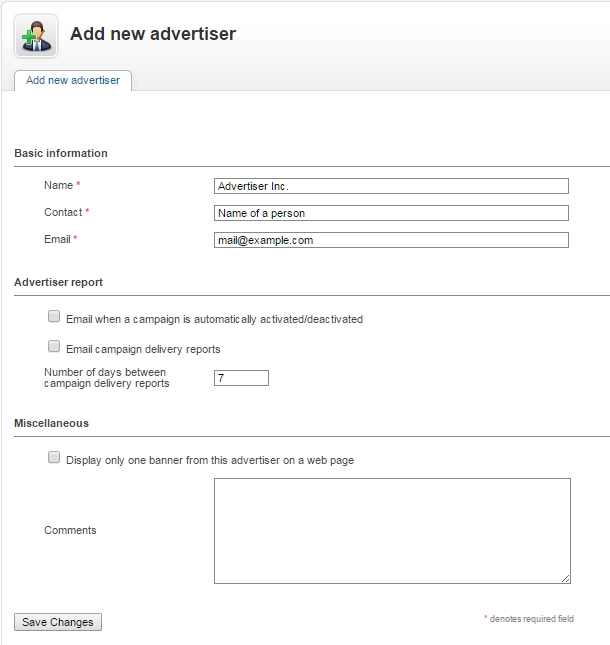
- For the Name, enter something that’s short but still descriptive. This name will appear in the list of Advertisers, and also in the statistics.
- For the Contact and their E-mail, you could enter the advertiser’s details. Be aware, though, that if you enable either of the two checkboxes below, Revive Adserver may start sending e-mails to that e-mail address. Discuss with your customer first if they want to receive those e-mails.
As an alternative, you could enter the name and e-mail address of the sales person in your own organisation who is responsible for this advertiser. - All other fields and settings on this form are optional, for this tutorial, just use the defaults.
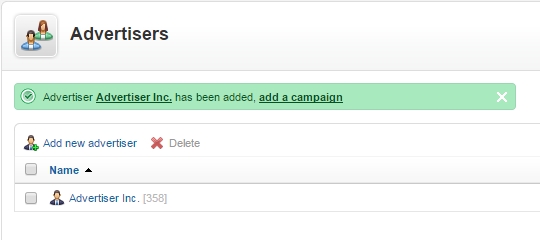
Clicking the Save Changes button will store the new advertiser in the database. You will return to the list of Advertisers, and a notification in green informs you that the new advertiser has been created.
You can use the link in the notification to Add a campaign, which will be the next step.
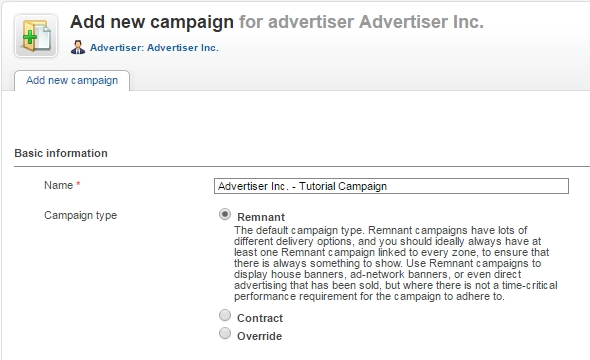
- For the Name, enter something short but still descriptive. Do not leave the suggested “default campaign” as the name, if all your campaigns would be called that same name, it will be impossible to distinguish between them. It might be smart to follow a pattern like “Advertiser name – Campaign Name”.
- For this tutorial, select the type as Remnant. As soon as you make that selection, the rest of the form appears with the relevant fields for a Remnant campaign visible.
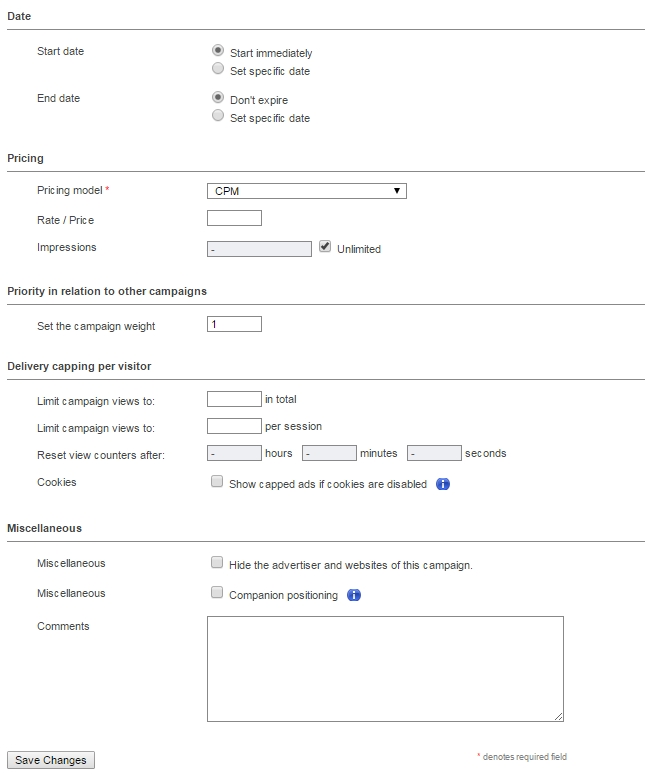
Now enter the rest of the details for the campaign, using the defaults presented automatically.
You will notice that despite the somewhat intimidating form, making a remnant campaign is very simple. Just enter the name, select type Remnant, then scroll down to the end and click Save Changes.
You can use the link in the notification to Add a banner, which will be the next step.
Create a Banner
If you’ve just added your first Campaign (see above) then you can now click the Add a banner link in the green notification. If you’ve returned to this tutorial later, and the green notification is no longer visible, you can also click the Add new banner link on the right hand side of the list of campaigns.
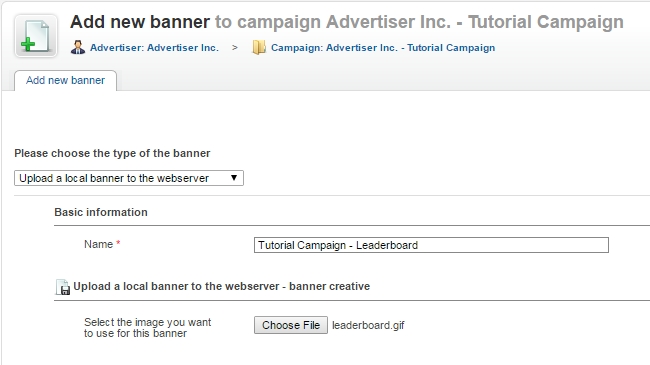
- For this tutorial, leave the Type of banner as the default, which is to upload an image file.
- For the Name, enter something short but still descriptive. It might be smart to follow a pattern like “Campaign name – Banner Name” where banner name could represent the description of the various sizes of banners in your campaign.
- Click the Choose File button to select a banner that’s stored somewhere on your disk or on the network. Once you’ve selected it, the name of the file will appear to the right of the button.
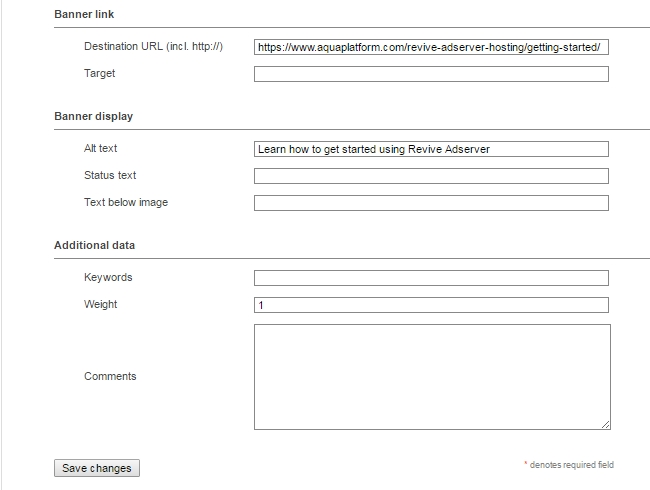
- Enter the Destination URL, which is the address someone will go to when they click the banner after seeing it on a website. In other systems, this may be referred to as the Landing page. It is not mandatory to enter a URL, but banners that can’t be clicked are very rare.
- Leave the field Target empty, which means that when the banner is clicked, the destination URL is opened in a new browser window or tab.
- Optionally, you can enter the Alt text that will be displayed when someone hovers the banner with their mouse, or by screen readers that are used by people with poor sight.
- Leave all the other fields at their default values and click the Save Changes button.
The new banner will now be saved in the database, and the banner image will be uploaded to the server at the same time. A notification in green informs you that the new banner was saved. There is also a preview of the banner, so you can quickly identify each one when you’ve created multiple banners in the same campaign.
There are just two steps left now: link your campaign to the zone you created earlier, and then grab that zone’s invocation code which will go on your website. Let’s start with linking the campaign to the zone.
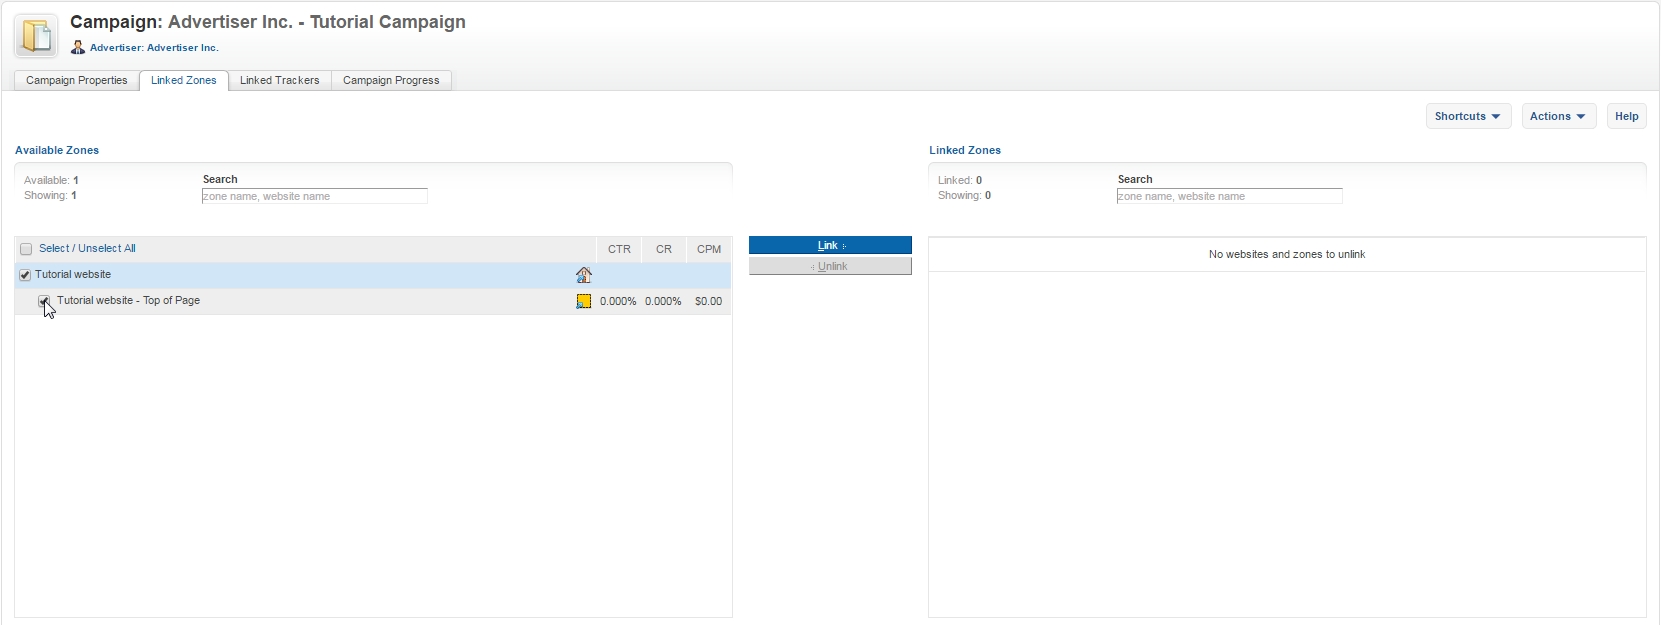
A screen will present itself that enables you to select the zone (or multiple zones if you have them) that you want your campaign to be linked to.
Using the mouse, click the check box in front of the zone’s name. Immediately, the Link button in the middle will be enabled.
You do not have to save anything here, linking and unlinking takes effect automatically.
All that remains now is to grab the zone’s invocation code and put it on your website. That’s the next and final step of this tutorial.
Generate zone invocation code
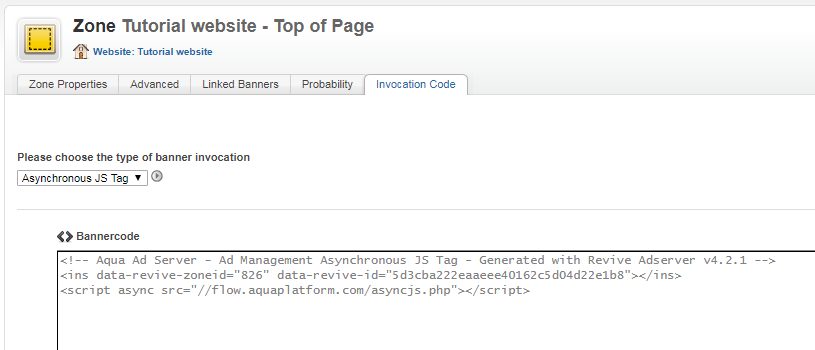
The Invocation code for a zone is a small piece of javascript code that can be placed on a web page. Every time the page is opened in a browser, that piece of code is also sent to the browser. The browser executes it and in the process, it sends a call to the ad server to return an ad. This process is called invoking the ad server, and that’s why the code is called invocation code.
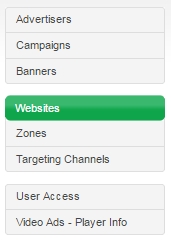
In this tutorial, there is only one website, so the zones link should be easy enough to find.
This will open a page where the zone’s invocation code is displayed, ready to copy and then paste into your website.
Just click anywhere inside the big box where the code is displayed, and then use your computer’s copy key combination (Ctrl-C in Windows) to put it on the clipboard.
Next, go to your web site, and using whatever way it has to enter javascript code into the pages, use your computer’s paste key combination (Ctrl-V in Windows) to put it into the site. Consult your website documentation or check with the vendor to find out how to do this.
In fact, that’s exactly what has been done as the conclusion of this page. The banner you see below is served from the Aqua Ad Server delivery platform, after having been created following the exact same steps described above.
If you studied this tutorial but do not have an Aqua Ad Server account with us yet, now is the perfect time to get started!
You’re most welcome to become our next customer!
Open an Aqua Ad Server account


